李慧晗
这一周主要考完托福了,而且还写了一份final report给Pepe。
1. Summary of Internship Experiences
In the past three months, I have learned a lot about the pediatric exoskeleton and related knowledge by reading papers and doing part of the projects.
l Read related papers about exoskeleton
l Read papers about Ground Reaction Force and Gait Cycle and send the e-mail to the authors requesting for data.
l Participate in the Rex experiments
l Participate in the brain project including setting up the LED circuit and writing the program.
l Set up the sensors of pediatric exoskeleton actuator for data collection and calibrating the sensors.
2. Specific Tasks of Internship
2.1 Read related papers about robotic exoskeletons
Jeff send me some papers and introduction material from some previous projects that were associated with the lab. Specifically, I finished reading some papers related to the sensors of exoskeleton. I think the sensors can be divided into four different types according to their usage.
(1)Sensors measure the relative and absolute position of the patient.
Every actuated joint can include two linear accelerometers to measure the angle, angular velocity, angular acceleration. Inclinometer at the waist to measure the absolute angle to vector of gravity(the accumulated error of every joint angle could be large)
(2) Force sensors
Measuring force between exoskeleton and ground; between wearer& exoskeleton's lower-limb; and force of ever actuator.
(3) Ground contact sensors.
When patients walking the undersurface of shoes wouldn't touch the floor at the same time. Ground contact sensors can monitor which side touches the ground at first and adjust the exoskeleton to ensure the walking process to be stable.
(4) Pressure sensors
Monitoring human-robot interaction, like pressure of strap. The overload pressure is harmful to patients.
2.2 Read papers about Ground Reaction Force (GRF) and Gait Cycle
After finishing reading the papers Jeff gave me, I talked to him about what I can do next. He recommended me to help with completing the 3D model of foot and putting the collected data of GRF from publications into the 3D model. Jeff wanted me to find out an equation to calculate the GRF according to the subject’s height, weight, walking speed and related data first. After I finish reading some related papers, I found out that most papers are concentrated on analyzing the effects of different factors such as gait speed, gender instead of conducting general equations to calculate or estimate the GRF.
In the paperRelationship between vertical ground reaction force and speed during walking, slow jogging, and running,the authors give equations to calculate vertical thrust maximum force (Fz) according to speed (ν) and vertical thrust maximum loading rate (Gz), but the speed is required between the range of 1.5m s-1and 3.5m s-1which is far beyond the pediatric walking speed.
I found out two most related papers,Ground Reaction Forces in Gait: Statistical Analysis and Interpretation; Ground reaction force estimation using an insole-type pressure mat and joint kinematics during walking.According to the two papers, the authors have measured the anterior-posterior force, medial-lateral force and vertical force, mean center of pressure positions during the gait cycle. However, the two papers only show the results by plotting. Thus, I wrote two e-mails to request for the force data as well as the physical information of their subjects, but I still didn’t get any reply from the authors.
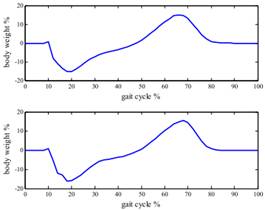
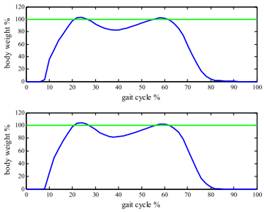
(a) (b)
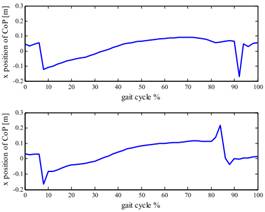
(c)
Fig. 1. (a) Mean vertical (Fz) GRF
(b)Mean anteroposterior (Fx) GRF
(c)Mean center of pressure positions
2.3 Participate in the Rex experiments
Before Maru and Alejandra leaving, they taught me about some basic protocols of doing Rex experiments. Then, I got a chance to work on the Rex experiments with Atilla, Manuel, Juliana and David for nine days. Through the experiments, I got familiar with following procedures:
(1) Find the Lateral Malleolus (ankle center of rotation); the Lateral Epicondyle (knee center of rotation); the Greater Trochanter to measure the length of lower and upper leg (hip center of rotation).
(2) Adjust the lower and upper leg length of the Rex
(3) Set up the EEG cap and digitize to locate electrodes’ position
(4) Gel and measure the impedance
(5) Help the subject to wear the Rex exoskeleton, stick one Opal to the forehead of the subject and put another on the Rex to keep track of the relative movement between the subject and Rex.
(6) Conduct the experiment serials including the training part, 3 to 4 blocks, six-minute stop and six-minute walk
The experiments were not so perfect as we expected. Sometimes, the position of the EEG cap is not so good. We needed to adjust the EEG cap and digitize many times to minimize the error. Sometimes, the impedance of a certain electrode was too high. So we used sandpaper to clean the electrode or replaced it with a new one. When doing the digitize, we recorded the time for each other and broke the recording every time.
2.4 Participate in the brain project including setting up the LED circuit, write the program and scanning the 3D face.
When Jeff assigned the brain project to David, I found it’s really interesting. Since I learned some basic knowledge about micro controller and programming before but never got a chance to put it into practice. So I asked Jeff to let David and me work together to build the LED circuit. We figured out how the Teensy and chip work by reading the data sheet and related tutorial online. We thought building the LED circuit could be very easy at first because the basic rules are not difficult to understand. However, when we really started soldering the circuit, many problems emerged.
(1) After we soldered about 13 LEDs, the light of the LEDs diminished and the color was not correspond with the programming. We checked the circuit many times to ensure that it wasn’t shorted and the wires were correctly connected. Finally, we figured out the power supply of computer’s USB port is not sufficient to support so many LEDs. Extra power supply is needed to light up the whole LEDs on the board.
(2) When we soldered the LEDs on both sides of the board, the LEDs kept blinking randomly because of the ground of both sides was not connected.
(3) After finishing soldering all the 30 LEDs, we connected the Teensy to the power supply, it heated up very soon and burned because of the high current and voltage. We can build a protect circuit to limit the maximum current and voltage on Teensy. But the easiest way is to separate the power supply of Teensy from LEDs by using batteries.
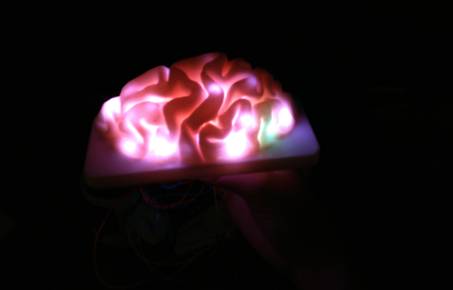
Fig. 2. brain model with LEDs
The programming of Teensy is not so difficult because the functions are built in the LED library - OctoW2811. I wrote the basic structure of the program. If the display model is certain, finishing the code is easy.
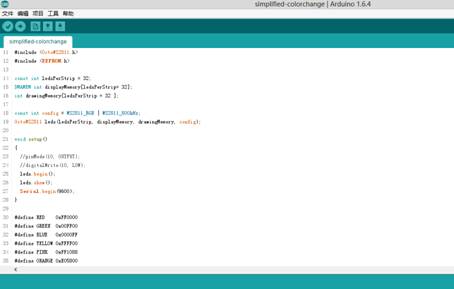
Fig. 3. Code for brain project
I also learned how to use the ‘David 3D scanner’ and scanned the five different emotion of Anastasiya. As for the brain, I learned from Jeff about how to sew the discrepancy of a scanned brain by using Solid Works.
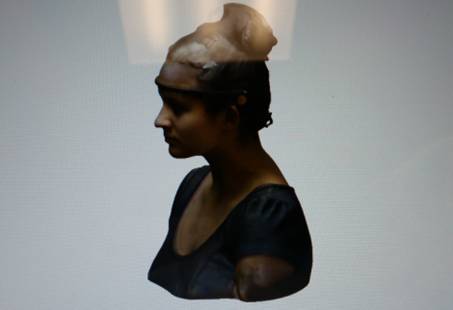
Fig. 4. 3D scanning
2.5 Set up the sensors of pediatric exoskeleton actuator for data collection and calibrate the sensors.
Set up the voltage and current sensor (Atto Pilot), IMU(MPU9150) and temperature sensor(TMP36). I wrote the code to read from the Teensy’s analog PIN. The data from the analog PIN is the PIN’s voltage.
According to the data sheet of voltage and current sensor, the maximum voltage it measures is 50V and the maximum current is 180A. So, the relationship between actual voltage (V) and analog PIN voltage (Vpin) is as follows:
V=(Vpin*50)/1024.0
The relationship between actual current (I) and analog PIN voltage (Vpin) is as follows:
I=(Vpin*180)/1024.0
For the temperature sensor, the offset voltage is 0.5V, output voltage scaling is 10 mV/°C,so the relationship between temperature (T) and analog PIN voltage (Vpin) is as follows:
T=((Vpin/1024)*3300-500)/10
Since the data calculation of the IMU sensor is much complex, thus, the calculation is conducted in the computer instead of Arduino.
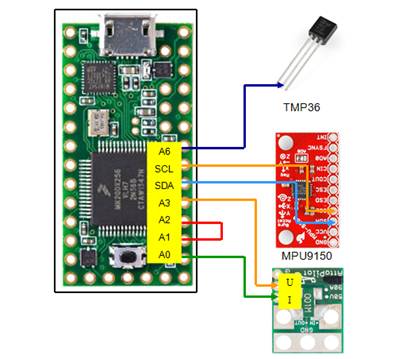
Fig. 5. Sensors’ PIN Configuration
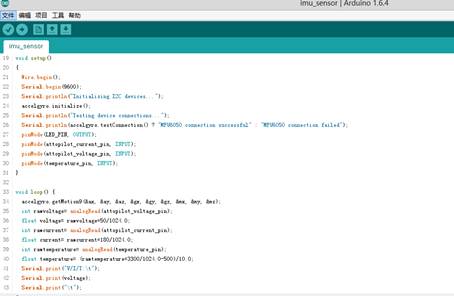
Fig. 6. Arduino code for sensor data collection
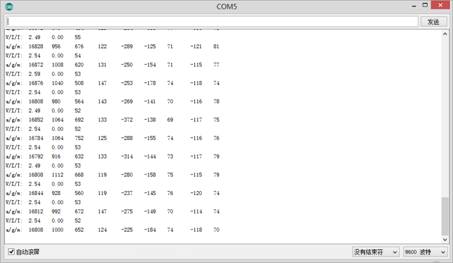
Fig. 7. Sensor data collected from COM port
After finishing the setup, I started with calibrating the sensors. I wrote the code to send the data collected from Teensy to the Matlab through COM port of my computer. Therefore, I can collect the real-time data from the sensors, plot in the Matlab and calculate the error and standard deviation. Unfortunately, I could not finish the whole calibrating part because of my DS-2019 form expiration.

Fig. 8. Matlab code of reading data from COM port
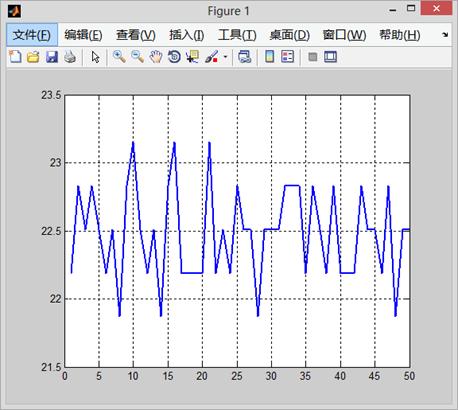
Fig. 9. Real-time sensor plotting in Matlab
叶庆莹
这么快就要到说再见的时候。再过几天,休大之行也就正式划上句号。三个月的时间,要问我收获最多的是什么,那应该是美国的生活和学习方式吧。一个月太短,一年太长,三个月正好,我从开始的兴奋激动、惴惴不安,到现在的轻松视之、慢慢融入。
印象最深的是学生的openness和学校的liberty。日常的校园里,经常可见学生席地而坐大方交流,工程楼一楼的大厅经常是学生展示的舞台,图书馆里的不同分区也满足了学生的不同需求,独立的单间、安静区的静心、讨论区的热闹,让我感受到一种自由而热烈的学习氛围。学生的不拘小节和学校的大方设计,让人觉得在这样的地方,随便拿一本书,坐在石凳上,就能享受一个下午。
休大校园的设计虽然不如莱斯大学那样精致,但绿化做的极好,如果你的周围没有被看到树,那么你一定被草坪包围着。另外学校的校园文化很浓厚,学校最多的标志就是鲜艳的UH。有时会有学生组织分发学校的小纪念品,比如便利贴、马克杯、文化衫、笔等等。虽然可能是不同的组织,但给人的感觉就是学校在办活动,因为宣传之中UH无处不在,让我感受到极强的校园精神。
最后就是实验室的学术氛围了。我看师兄们做实验都非常积极,每天都乐呵乐呵的,当然除了开组会的时候,他们教给我了许多,其中最重要的就是积极主动去找问题和解决问题。希望在今后我也能坚持下去。
离开不是结束,而是新的开始!

图一工程楼前的合影
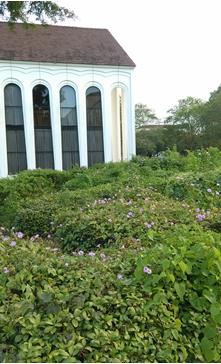
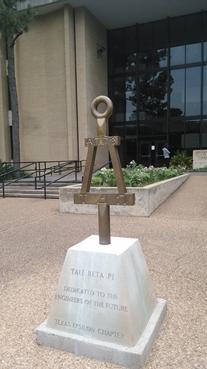
图二Law residence hall外景 图三工程楼外纪念碑
储晓青
实习就快要结束了,这周主要在忙自己的事,本周五向Dr. Yao汇报完了项目的情况,做了check out。继续忙申请的事,看学校准备申请材料。另外,还在帮国内的朋友代购一些化妆品和手机。
戴政泓
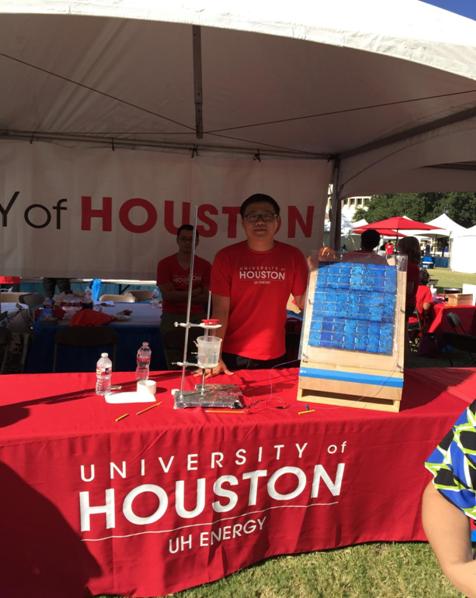
这周收获挺大的,首先是硫化钼薄膜生长,这周Romel和我每天做两次实验,由于减少了Mo Source的量,我们重复了之前的结果,并且每次的triangle flakes的大小都能够达到15个micron,算是不错的结果了。其次包老师最后两周又给了我一个新的项目-CoO laser ablation,简言之,就是用飞秒级的激光轰击CoO表面,使之表面具有不同的形态,增大其比表面积,得到的CoO可用于光解水的催化剂良好载体。另外,这周三之前完成了solar panel的制作,封装,测试,用于周六的Houston Energy Day的展示。
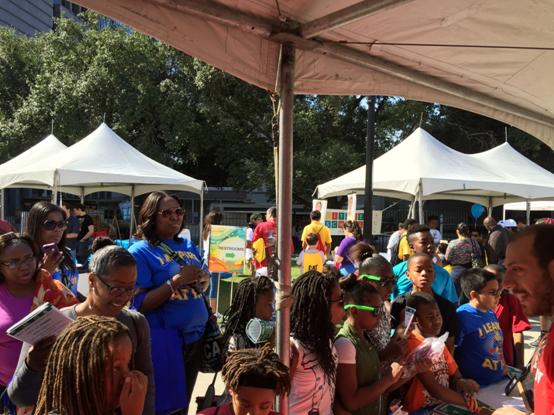
Energy Day当天,学长带着我一早就驱车来到了休斯顿downtown的Sam Park,美国人对此类活动的重视程度还是很高的,一早就把Sam Park的路口封了起来。来参加活动的都是一些小朋友,看着我们的电解水setup一个个都瞪大了眼睛,”is it boiling?” ”will I get electrocuted by touching this?”只好一一耐心解答,当然也有很多小学霸,一眼就识破了我们的trick,和我们讨论起了电解的基本原理。能够参与这次Houston Energy Day的活动于我而言也是一次非常难忘的体验了。下周就要离开休大了,实习时间不算很长,但是收获却很多,增长了见识,完成了科研,结交了朋友,锻炼了身体。三个月的结束是新的起点,加油!
韩聪
最近天气不断变凉,我们在休斯顿的实习生活也进入了尾声。在这最后的一段时间里感受休斯顿的生活气息。
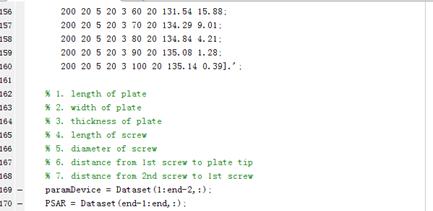
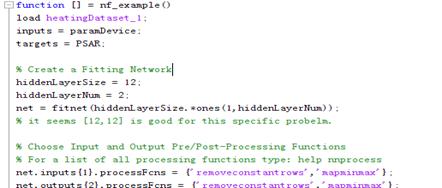
在实验室要对实验结果进行收尾和总结。最后还是用了当初设想的万不得已的方法—神经网络—来对实验的数据进行处理。首先是对数据矩阵进行处理,去除冗余数据还有特殊情况(no screw)的数据。然后通过不断试验,建立两层,12个隐元的神经网络。70%数据用做train,15%用作val,15%用作test
每次训练结果有差异,有的时候误差较小,有的时候误差较大,但这也是神经网络的特点,只是下面我们想改进下相把绝对误差控制变为相对误差。
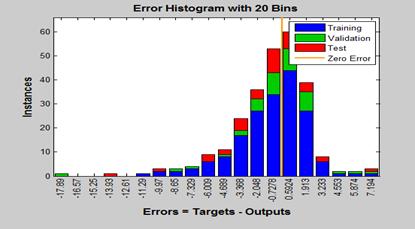
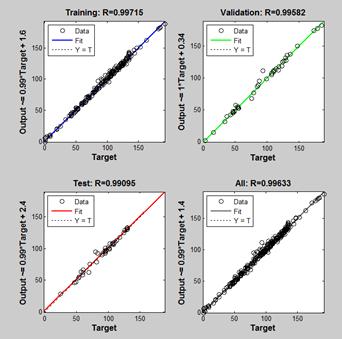
以上两图就是训练效果比较好的情况。
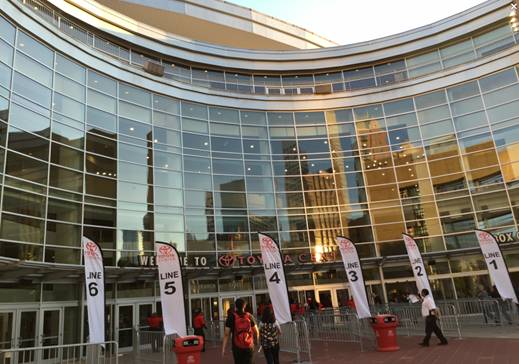
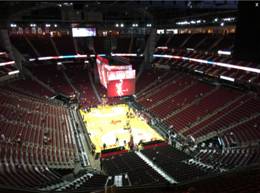
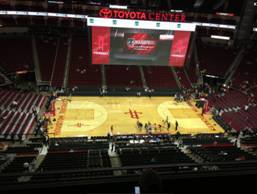
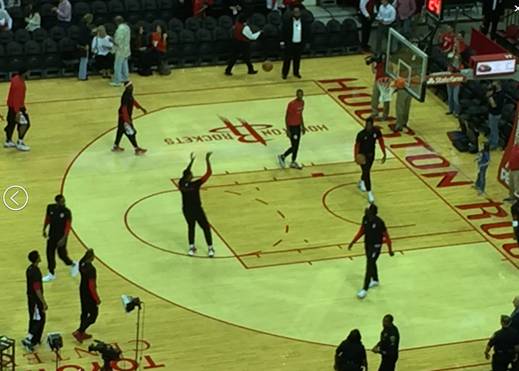
生活上面,除了看了博物馆,最兴奋的还是体验了一下NBA的现场。丰田中心是从姚明时代开始令中国的篮球爱好者神往的地方。有幸的是看到了当今联盟第一得分后卫詹姆斯哈登的演出,虽然他今天手感不佳,但还是见到了他卓越的造犯规能力。遗憾的是今天魔兽霍华德和浓眉哥戴维斯没有上场。现场的气氛很好,看得出篮球文化对美国的意义,也正是在民众中如此普及,所以才使得美国的篮球事业水准很高。不说了,上图。
还有最后不到一周的时间,我们要更珍惜这段时间。
熊诚
实习临近尾声了,这一周老板和师兄去了亚利桑那,我在实验室继续那个实验,同时帮伊朗小哥做实验,这一周实验结果不是特别好,然后自己也不知道怎么办,所以只能等老板回来了再说。
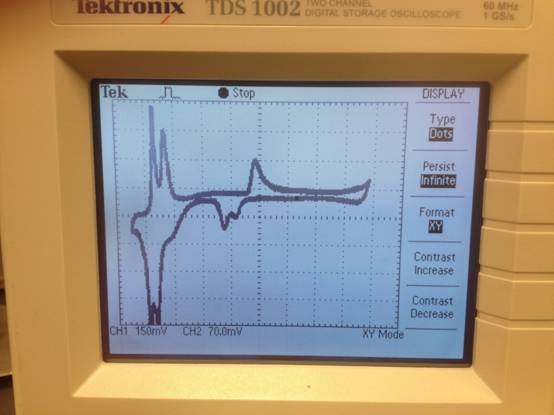
而且到了申请的季节,我也要一边准备申请材料,一边做实验,也是比较忙的,临近万圣节,很多活动都开始了,但是感觉UH对这个的热情不是那么高涨,加利福利亚的同学就已经开始准备万圣节的道具了。
这一周平平淡淡,并没有什么大事。